by Fay

Luckily I have quite a bit of garden area to plant in, which I have done. I also had heard about the Wicking Bed method and thought I would give it a go.
Wicking Bed Systems is a way to grow vegetables, etc in a sealed container (no drainage). The bottom half has a water reserve and the top half is soil. The idea is that you use less water as the soil wicks the water from the reserve below.
When I first heard about wicking beds there was not much information available online on how to arrange and set one up, but I did see someone had made theirs using an old apple crate.
In different parts of the world these large wooden crates are known by different names. I just call them Apple Crates as that is what I know them to be used for at the fruit wholesale markets.

I determined that my front yard was the best place for wicking beds as it is flat ground and receives long hours of direct sunshine.
I wasn't sure where to get the apple crates, so I went to trusty old Google and searched for large wooden crates (in my area). Low and behold there was a company that had stock quite close to where I live. They also delivered them and set them into place where I wanted them to be.
Funnily when the owner of the company asked me what I am going to plant and I told him I am turning them into wicking beds, he said "that will never work".
Well Mr Owner, 3 years later, they are working just fine that you very much!
I bought 3 and had them placed on the front lawn. Each one is approximately 1m x 1m x 1m.


They came with the plastic sheeting on the sides but this is not of any use when making them into wicking beds, so it's ok if the crate you use doesn't have it.
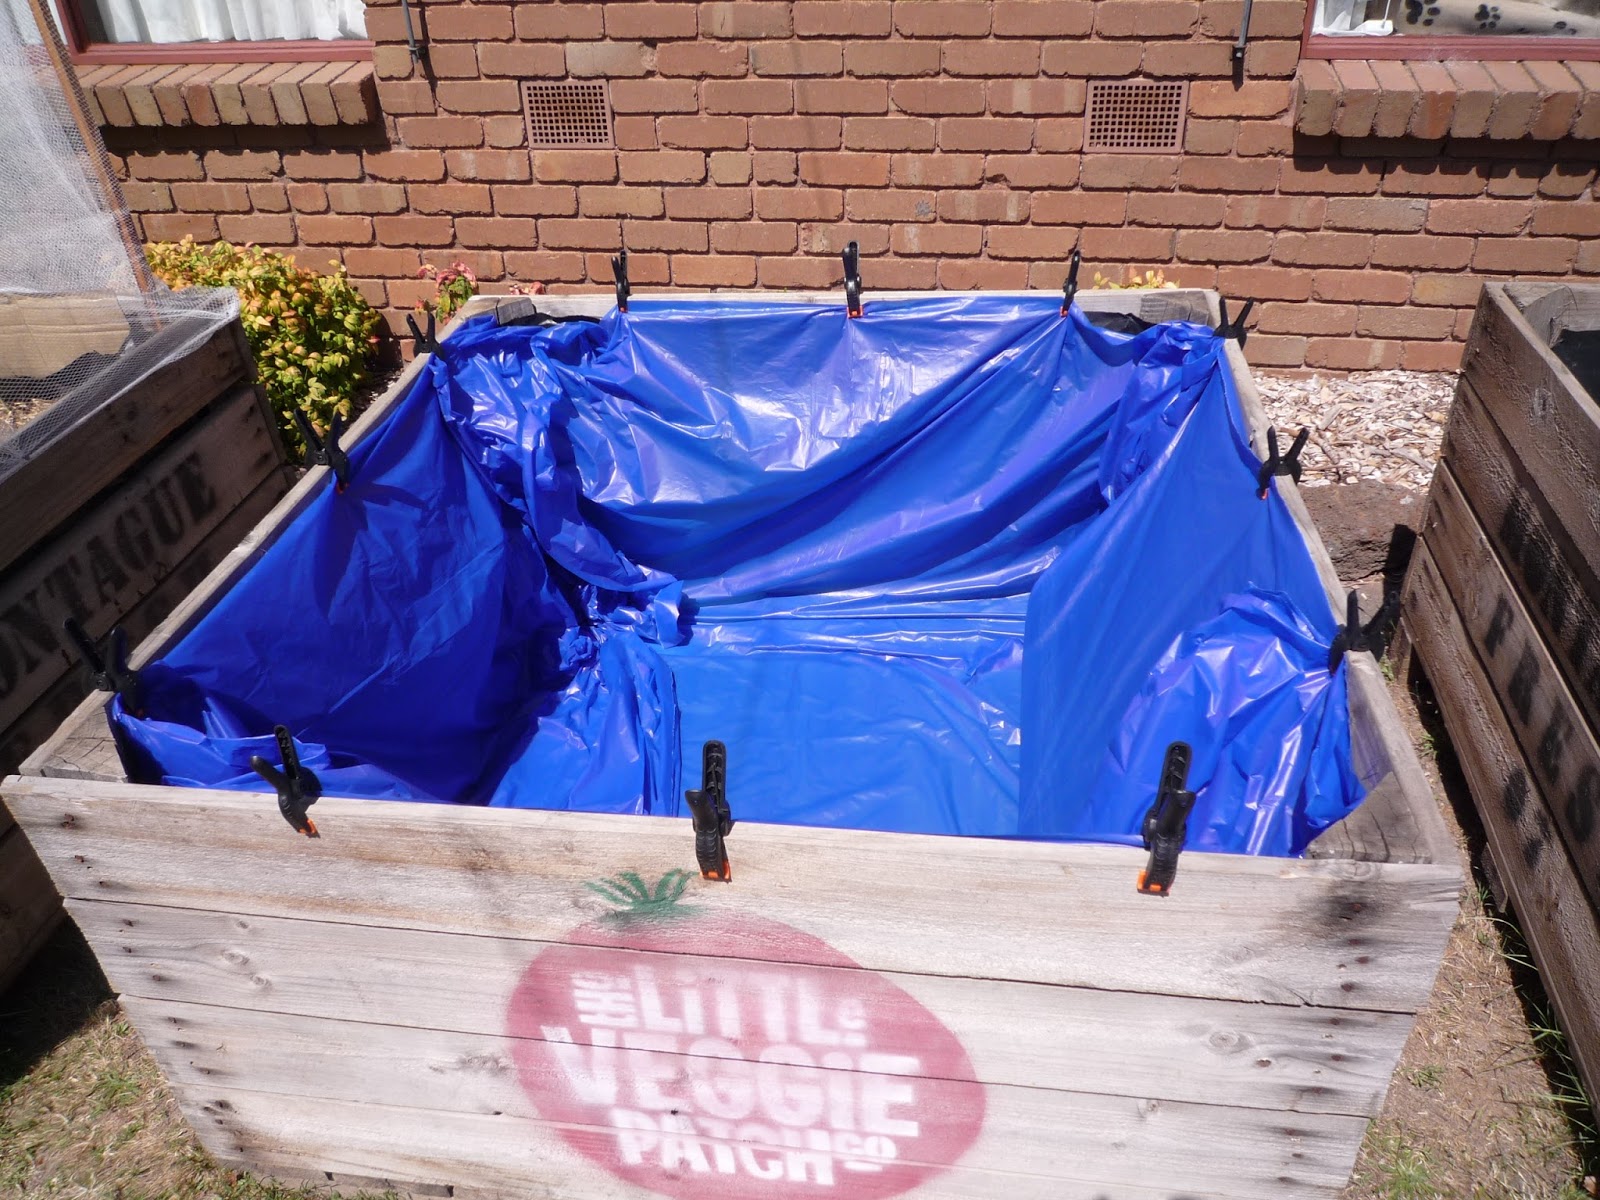
I first laid cardboard on the base and up the sides. This is to help protect the plastic sheeting / tarp you are going to use next from getting any splinters that could cause a possible leak. Make sure to use strong thick cardboard. I broke up heavy duty boxes.

For the first crate I used a cheap plastic drop sheet. It was not a good idea as they're just too thin.

My other two crates I used water-proof tarps.

This next part can be a bit tricky to do on your own. It can be done with patience but much easier with 2 people (4 hands).
You need to open out your water-proof protection and lay it in the crate so that the base and all sides are completely covered.
Clamps are helpful for keeping it in place while you are filling the crate. The clamps will not be needed once the crate is full.


You will need to calculate the squared metres of your crate so that you will know how much Scoria and soil to buy. My maths are not the best anymore, so once again I went to google.
You will need 300mm of Scoria and 300mm of good quality vegetable growing soil. I had read that this is a good depth for productive vegetable growth.
Scoria is a volcanic rock and available in different sizes. It's available from landscaping suppliers and large garden centres.

I worked out the size I wanted, 20mm, and also calculated how much I would need to order to fill the 3 crates each to a depth of 300mm.
The supplier can also work this out for you. Just give them the size of your crate and how deep you want it to be.

The best method that I found for getting the Scoria from the mound into the crate and spread evenly was to use a sturdy bucket.
Pour slowly and NOT from high up; try to get nice and close to where you need the rocks to be. Spread out gently.
I found just using a shovel to be quite labour intensive and the rocks crashed down on the plastic.


When the Scoria is at a depth of 300mm and leveled out, then you need to lay out the watering system. That may sound complicated but it's super easy.
This is what I used:
Slotted Draincoil
600mm length of PVC Tube
90 degree PVC joining piece
Right-Angle Joining Piece
End Cap
Sizes, lengths and dimensions will depend on how large or small your crate is. I suggest you go to a large hardware store and you will find these items in the plumbing section. Just look and see which suits your situation the best. That is what I did.
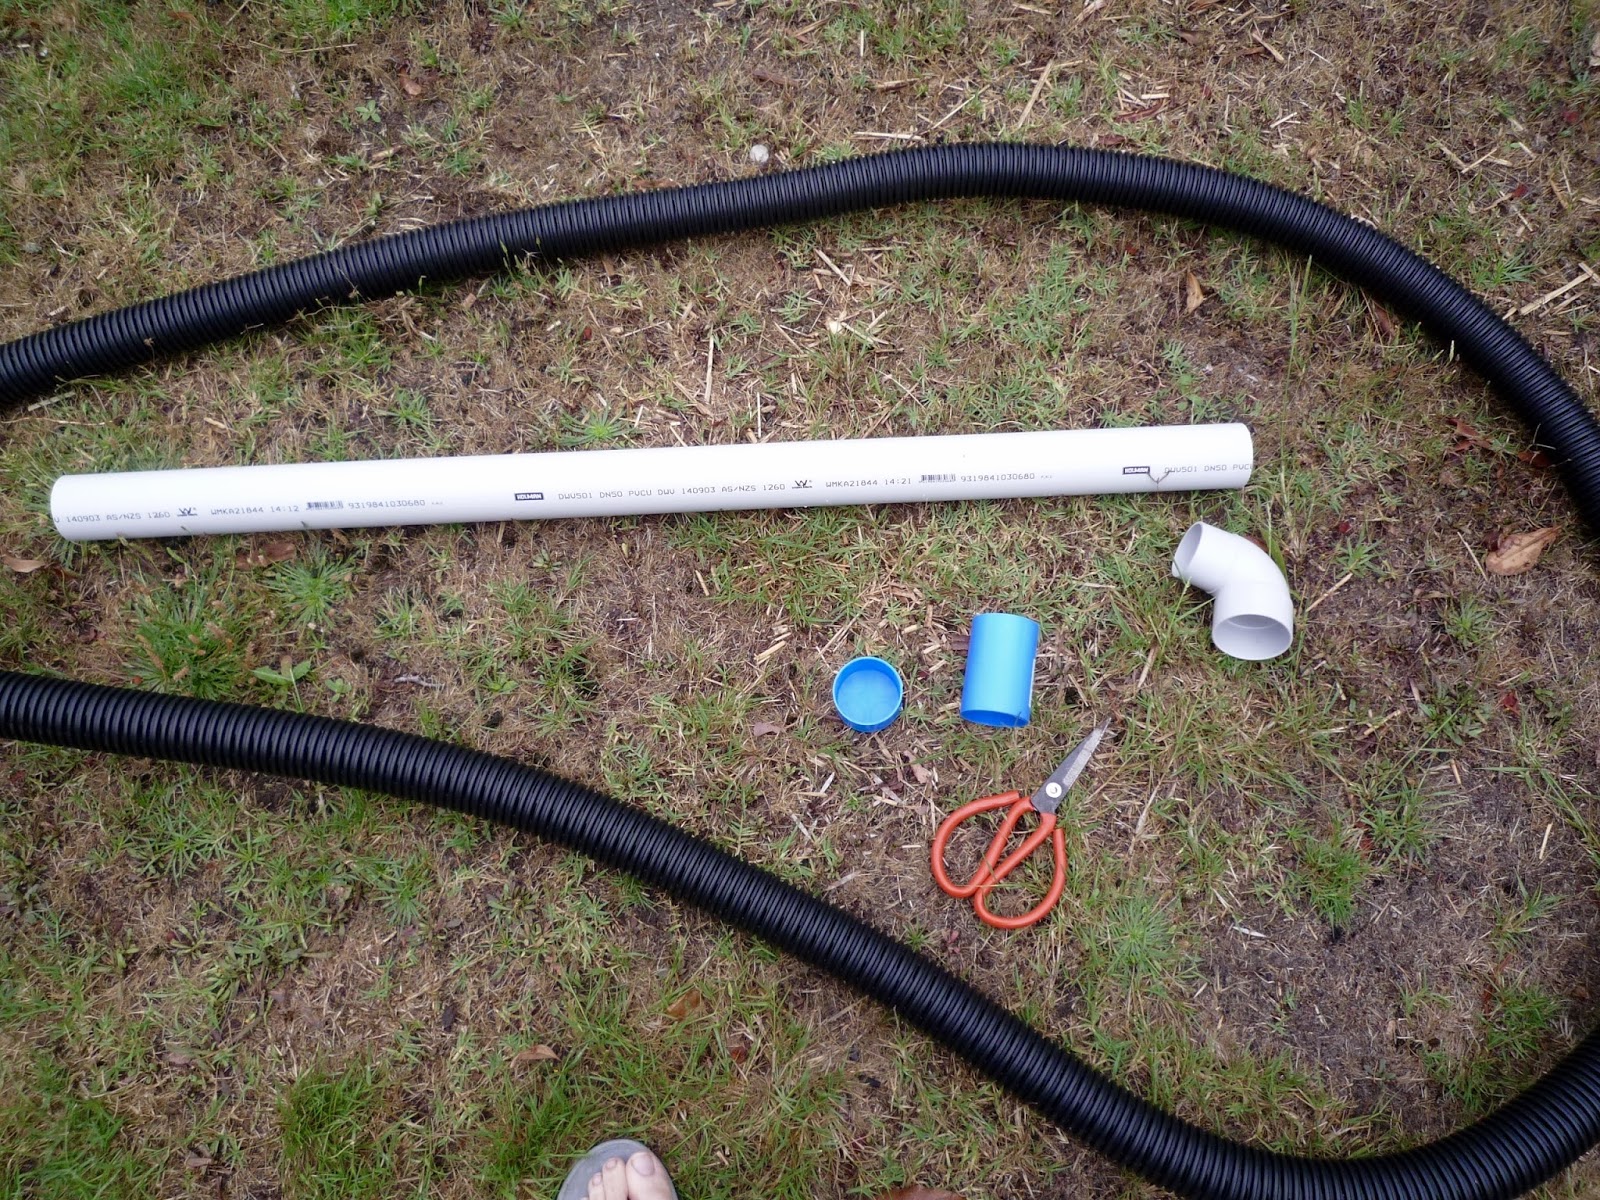

The diameter of the pipe was different to that of the right angle bend joint fitting so I used a connector fitting to change the diameter. One end of this blue connector was the correct size of the pipe and the other end of this blue connector was correct for the right angle fitting.


Attach the end cap to the end of the Slotted Draincoil pipe.

Now just push all the pieces together, including the water filling tube (the upright PVC pipe).
No glue is required if you bought the correct fitting sizes.

This next part was what I would say the most difficult, but not really. As long as you have a Hole Bit for your drill then it's easy to do. Make sure to cut the hole through the crate and the plastic lining just above the Scoria.
The drainage hole is the over-flow for the Water Reserve. When water flows out of this tube, you will know that your tank it full.


This is the plumbing part that I used. I chose this method as it came as one piece. Alternatively, you can use a piece of hose or plastic tubing. Either method is fine.


Now fill the water reserve tank with water. Do it via the filling tube so not to disrupt the Scoria.
Always fill the tank this way. Re-filling will depend on the season and weather. I found that in winter I only rarely had to fill it and in summer about once every week or two.

Once the water reserve tank is full and you are happy with the progress so far, then you can proceed to the next part. It's better to check for leaks and mistakes at this point because once you fill the crate with soil it will be very difficult to rectify any problems.
You now need to place something over the tubing and Scoria to protect them from becoming clogged when the soil is added.
Plastic is not an option, you need to use a material that will allow the water to be wicked up by the soil.
This is what I used.
Drain matting needle punched short fibre non woven geotextile


Now for the final part of this tutorial I need to apologise. I didn't take photos of placing the soil.
All you need to do is add 300mm of good quality vegetable growing soil and plant seedlings or seeds of your choice. Once the crate is full, you can remove the clamps that were holding the lining in place.
Even though the water tank is full, it would be a good idea to lightly water the soil surface when planting new plants and seeds.


Do help protect plants, I constructed a frame from 2 lengths of electrical conduit pushing into the soil from corner to opposite corner, securing in place with a zip tie at the top of the overlapping conduits. I then draped insect netting over the top.